目前的解决方案:Hexo & cactus + Github Action
Blog
Blog 采用 Hexo 引擎 cactus 主题,并对主题做了些微改动
部署过程
我这里使用的是 Node.js 18.x 版本
1
2
3
4
5
6
7
8
9
10
11
|
npm install hexo-cli -g
npm install hexo-generator-search --save
git clone https://github.com/[your_name]/blog.git
cd blog
hexo init
git clone https://github.com/probberechts/hexo-theme-cactus.git themes/cactus
|
1
2
3
4
5
6
7
8
9
| title: '标题'
description: '站点简介'
author: '作者名称'
language: zh-CN
url: 'https://[your_name].github.io/'
theme: cactus
...
|
- 编辑
blog/theme/cactus/_config.yml,配置内容参考作者提供的文档即可
https://github.com/probberechts/hexo-theme-cactus
Github Action 自动化发布
- 编辑 .github/workflows/hexo.yml
1
2
3
4
5
6
7
8
9
10
11
12
13
14
15
16
17
18
19
20
21
22
23
24
25
26
27
28
29
30
31
32
33
34
35
36
37
38
39
40
| name: hexo-ci
on:
push:
branches:
- main
- master
permissions:
contents: write
jobs:
deploy:
runs-on: ubuntu-latest
steps:
- uses: actions/checkout@v4
- name: 使用 Node.js
uses: actions/setup-node@v4
with:
node-version: "18"
- name: 安装 hexo
run: npm install hexo-cli -g
- name: 安装搜索
run: npm install hexo-generator-search --save
- name: 安装 markdown 图片索引
run: npm install hexo-image-link --save
- name: 生成静态文件
run: hexo generate
- name: 发布到公共仓库
uses: peaceiris/actions-gh-pages@v3
with:
personal_token: ${{ secrets.PUBLISH_BLOG }}
publish_dir: ./public
destination_dir: blog
external_repository: [your_name]/[your_name].github.io
publish_branch: main
|
我这里是跨仓库发布,因此需要一个 TOKEN,上面我命名的这个 secrets.PUBLISH_BLOG
登录 Github 之后,打开 https://github.com/settings/tokens/new 页面
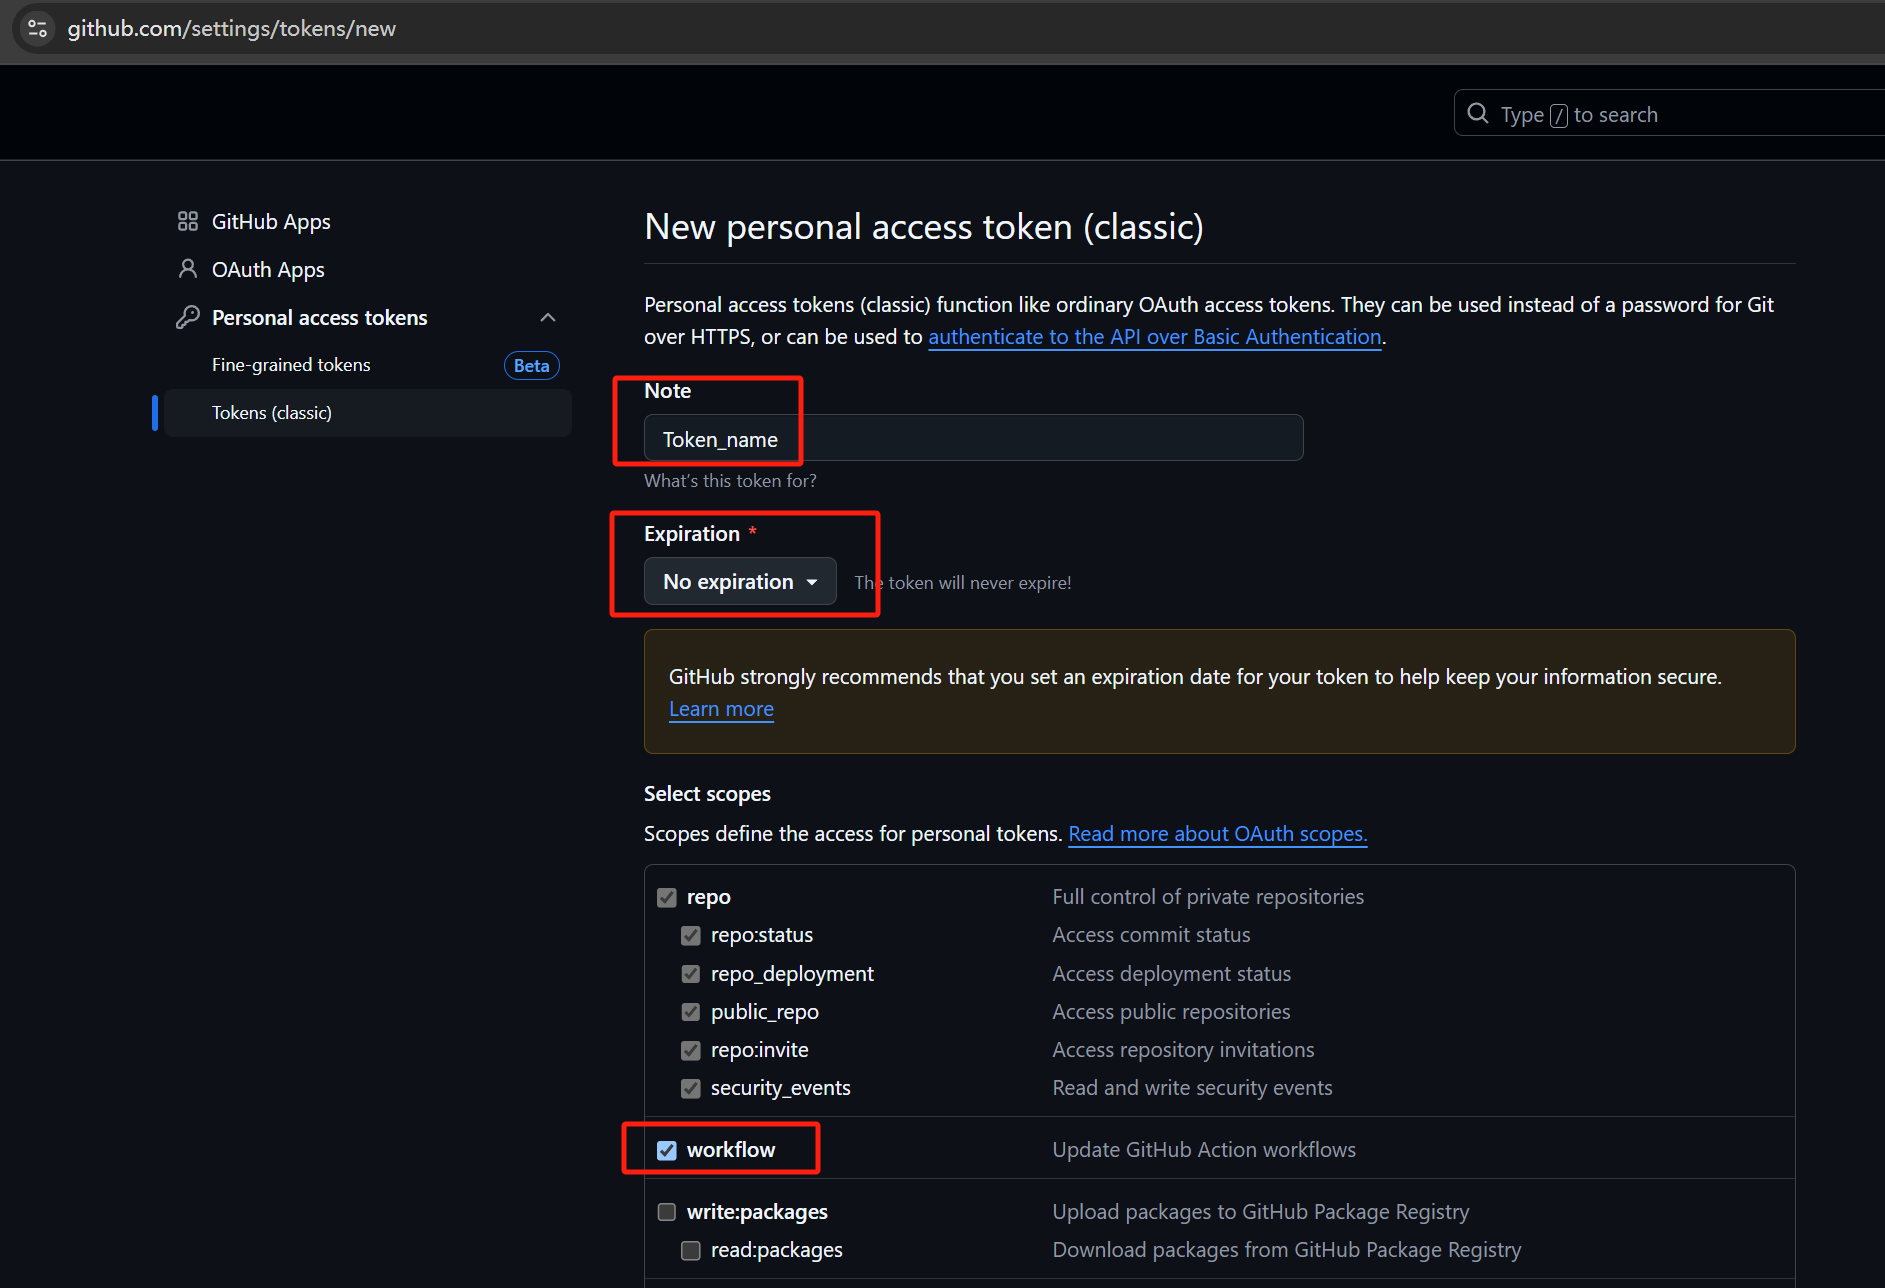
- 这里的 Note 可以随便设置,是用于区分 token 的,以便于看到后可以快速回忆起,建议设置成仓库名:Blog_token
- Expiration 是可以时间,我嫌麻烦一般设置成永久,安全起见可以设置成 90 天,然后过期再更新
- 下面的作用范围只需要勾选 workflow 就行,会自动选中 repo 权限
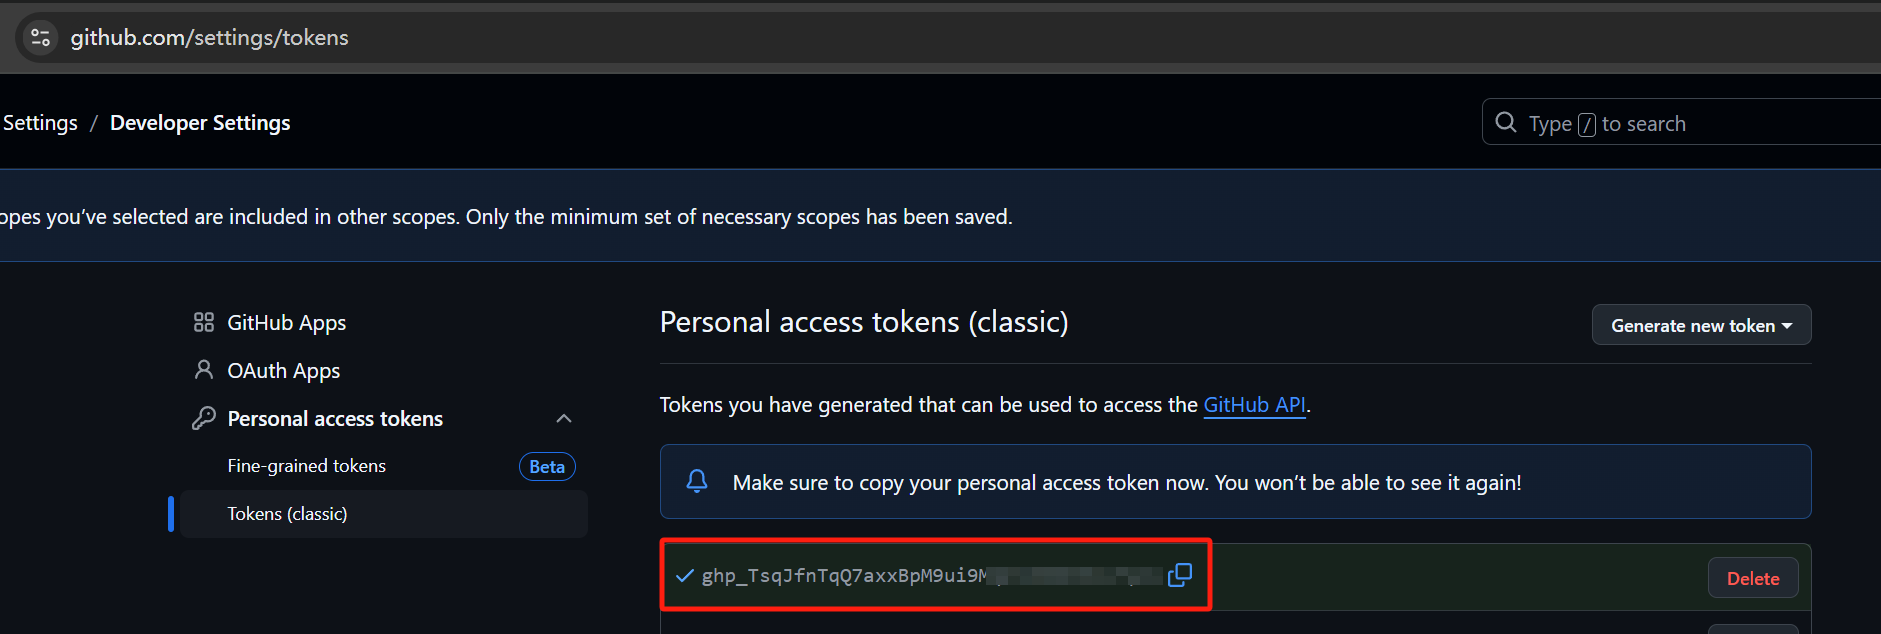
生成后会得到一个密钥,先复制下来待会要用
打开 https://github.com/fermionorz/blog/settings/secrets/actions/new 页面,添加刚刚复制的密钥
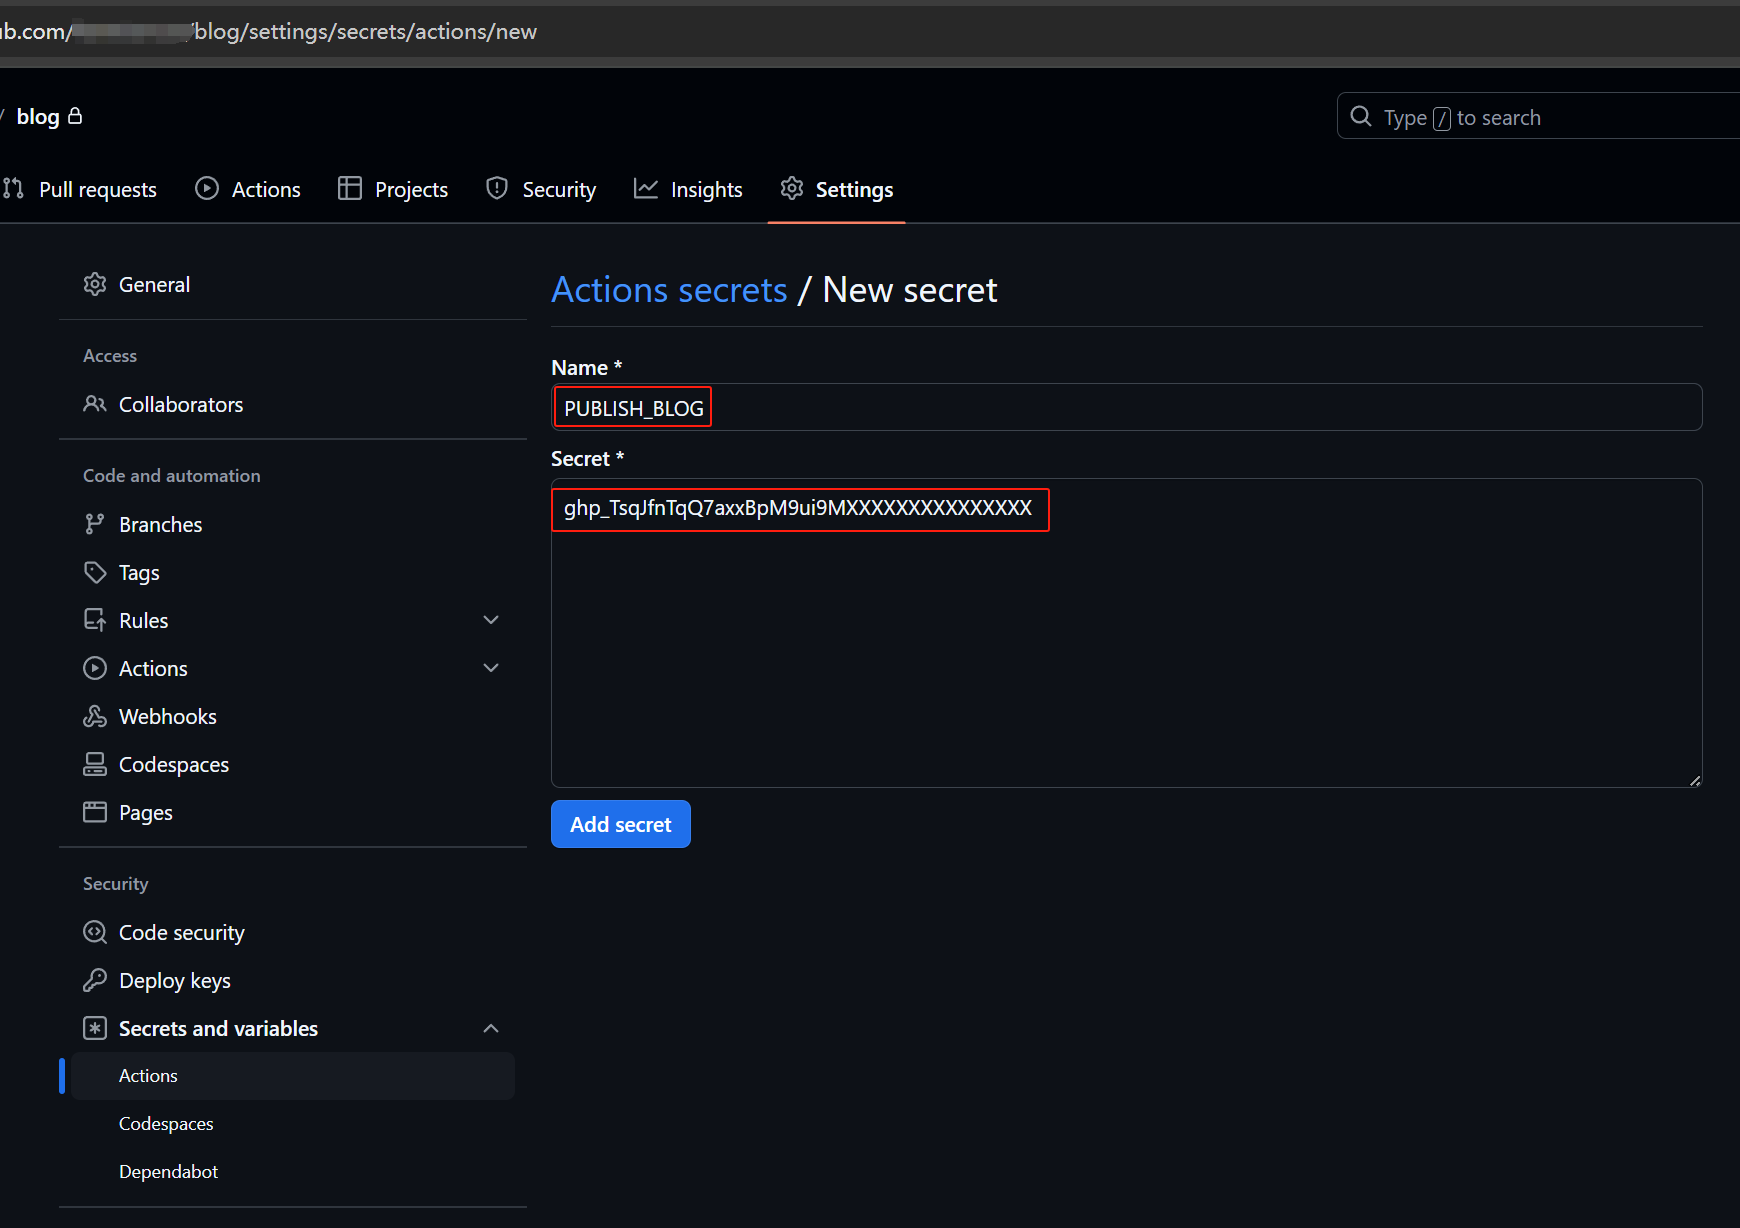
添加成功后的效果
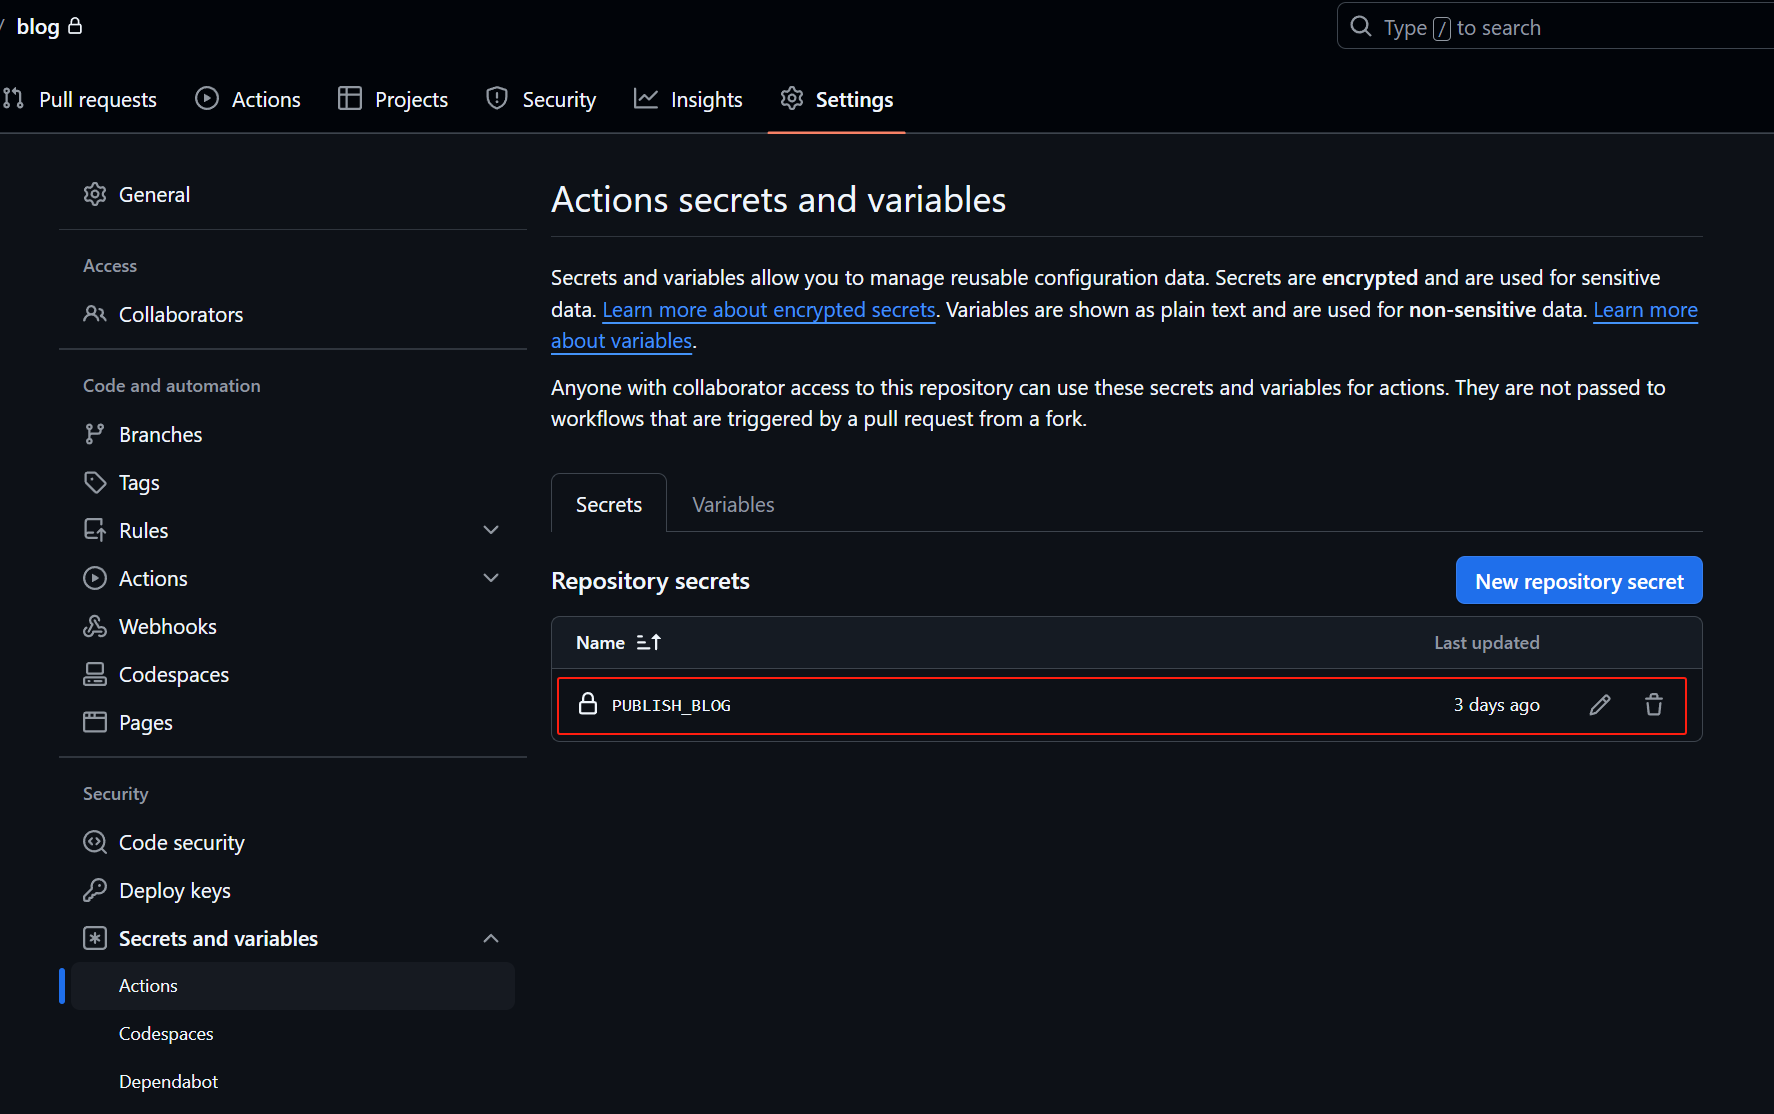
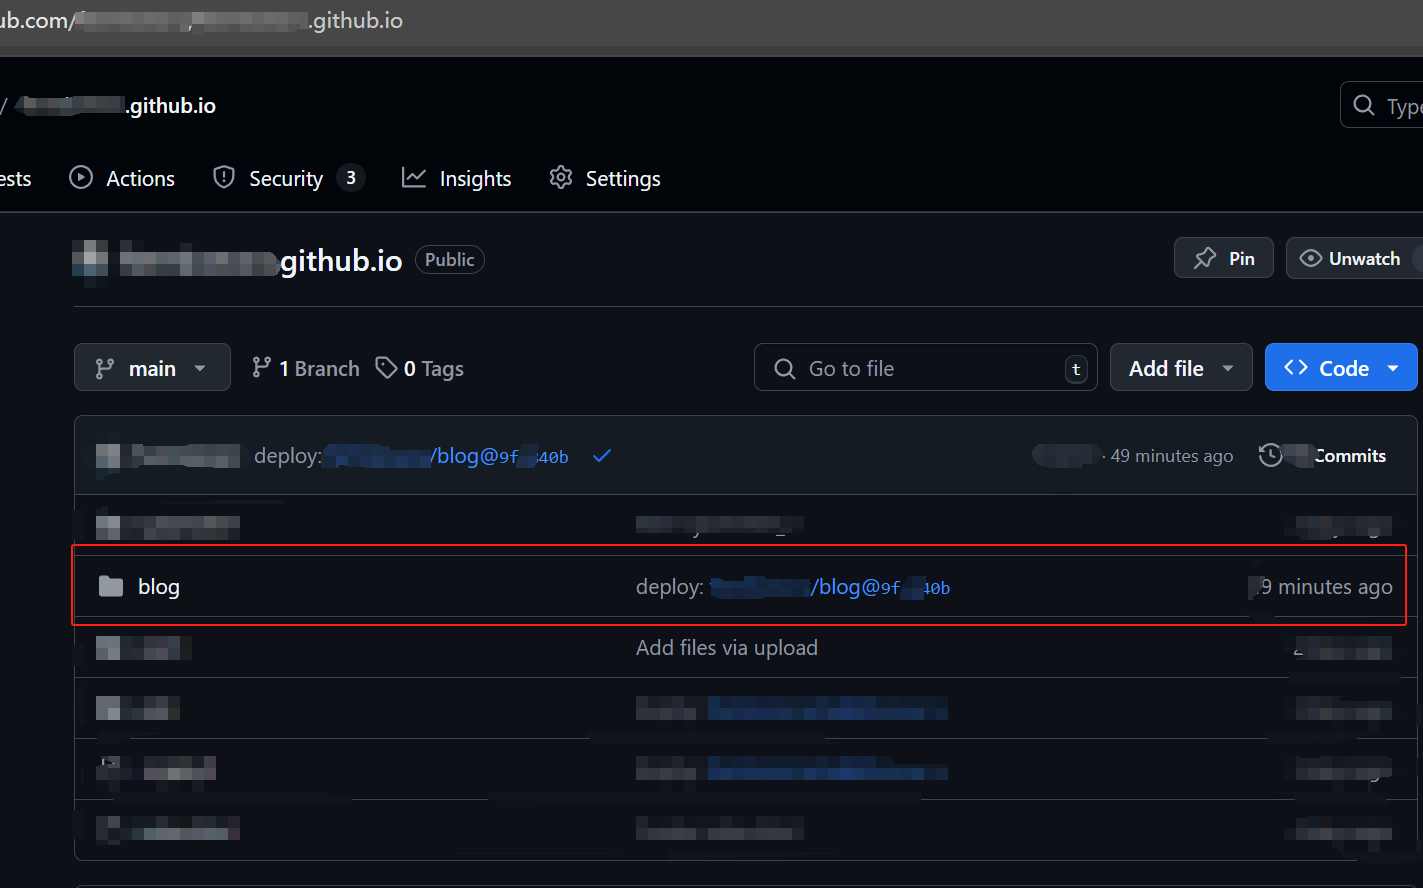
这里就没问题了,这个时候每次对仓库进行提交,都会自动把内容发布到 [your_name]/[your_name].github.io 仓库的 blog 目录中
然后可以转到 [your_name].github.io 仓库看到了
